Friday, May 31, 2013

Scraps Of Elegance June Kit Reveal-Whimsy!!


Welcome to the weekend and to the Scraps of Elegance June Kit Reveal!! The kit is called Whimsy and it is just packed full of so many gorgeous, and whimsical things. It is so perfect for capturing a little romance and whimsy in your life~


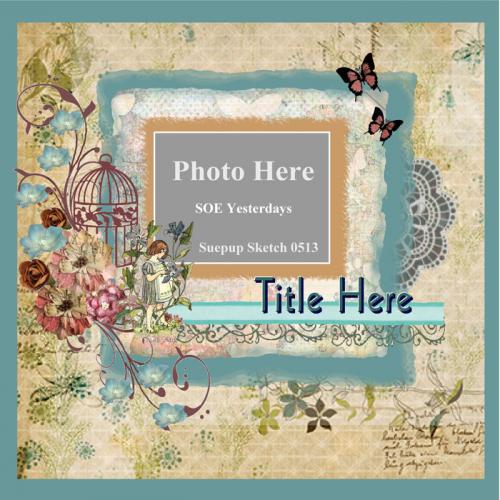
This is the gorgeous sketch that Suepup created for the kit, ao inspiring and FABulous!

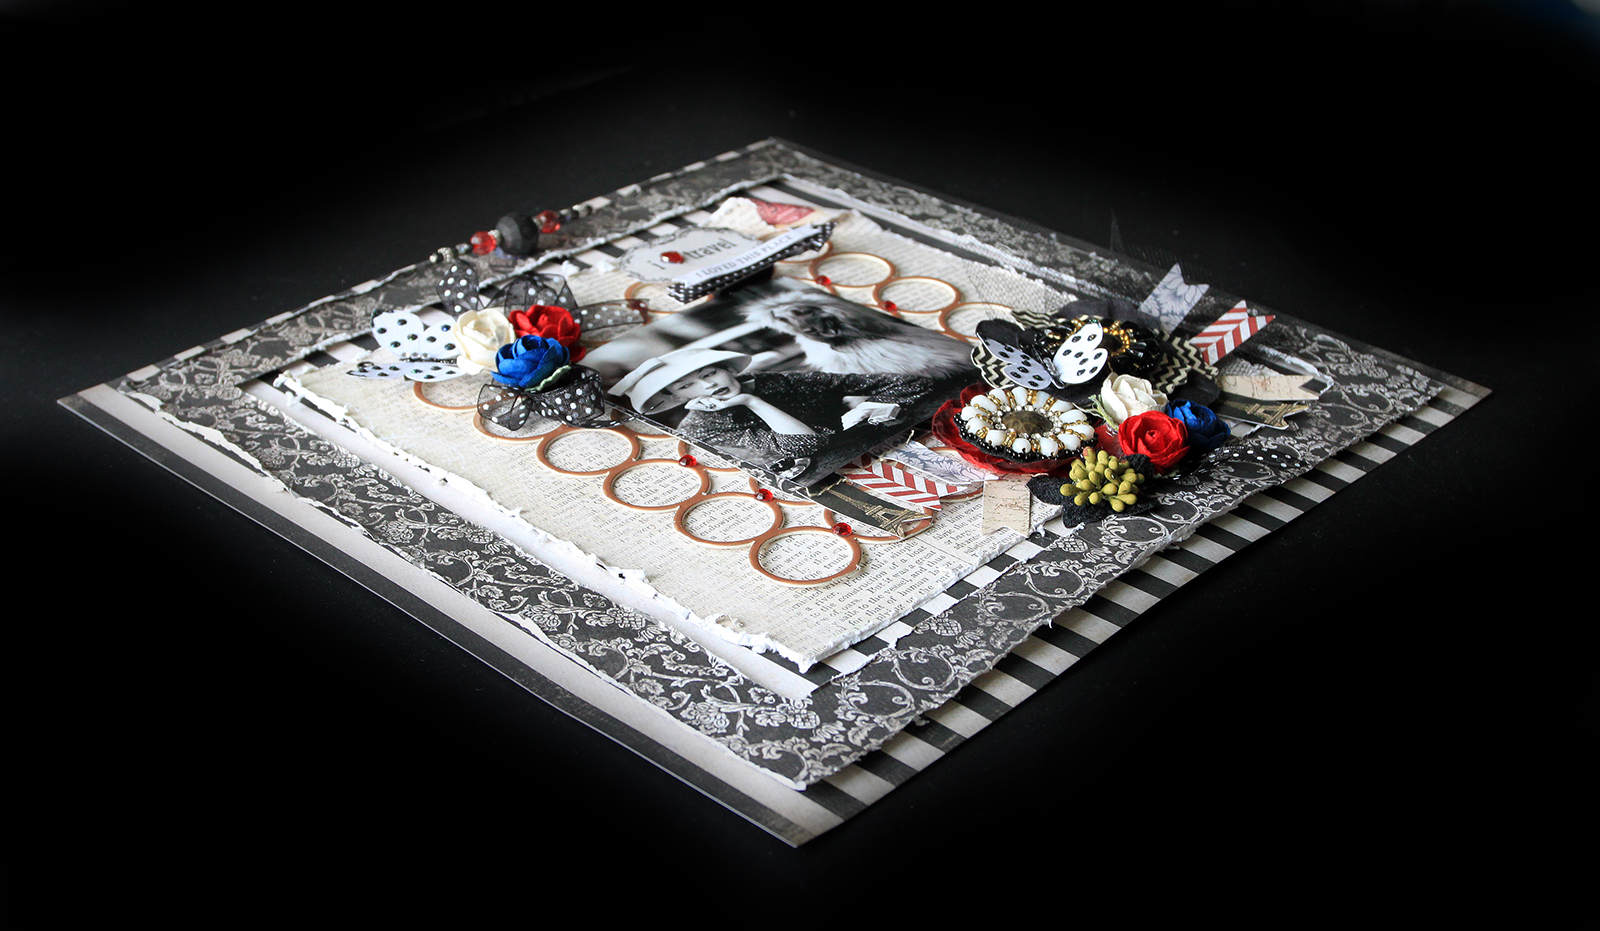
The following is my take on the sketch, and shows the romantic, and Shabby side of the kit. It features a photo of my Aunt Annie's daughter, Michelle at her wedding with her new husband Richard, and her sweet son, Mason.


I started by layering in some of those gorgeous Prima Lyric papers from the kit. I did some edge distressing, distress punching, and fussy cutting.


The large flower was from the kit, and I layered in a Doily behind it to match the one I layered behind the photo. I used lots of flowers from the Flora & Fauna Add on, as well as some stash flowers, and past kit flowers. All the leaves were hand stamped and fussy cut, and then added in. I added flowers, leaves, pearls and bling to the chandelier on the background paper as well.


Here you can see more of the flower work, and the little stash clock that I added with some oversized chipboard hands, a little resin lock from a past kit and more of those Flora & Fauna Flowers, and hand stamped leaves. The Love Story Butterflies are from my Reneabouquets Etsy Shop and were created just for this kit.


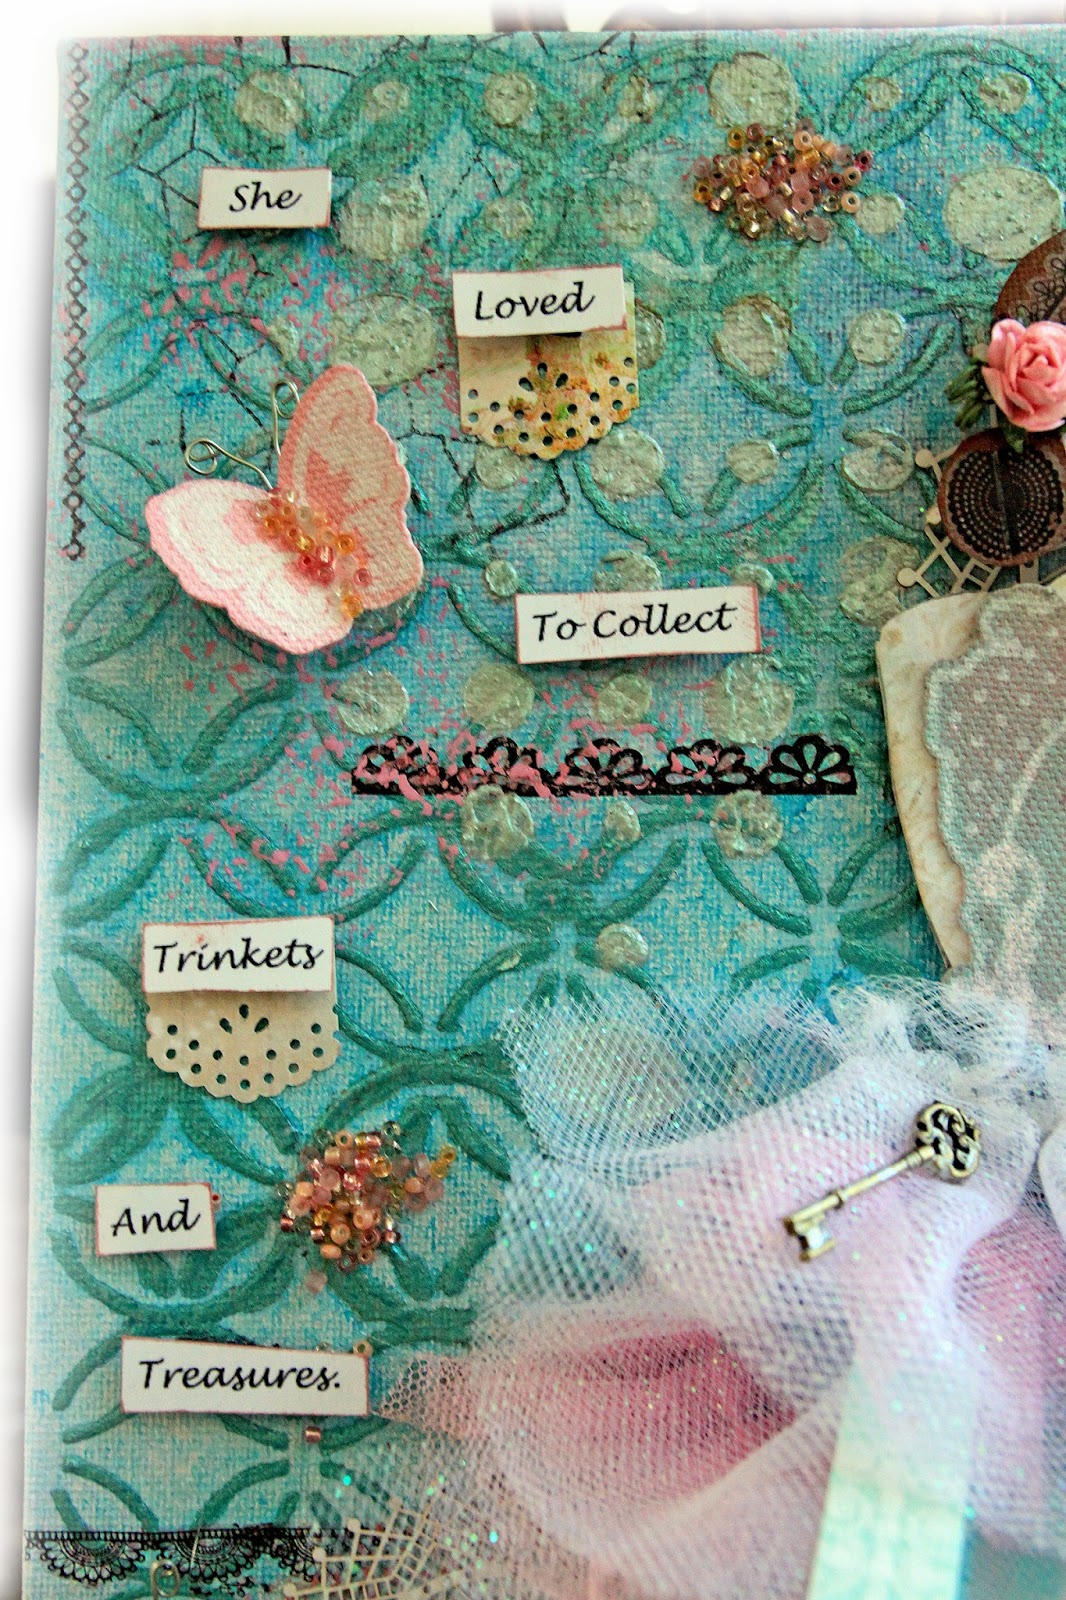
I created the Shabby Chic banner by cutting card stock banners, and then layering them with banner shaped cuts from the kit paper. I then took and affixed them to a pearl strand, and created panels with some old lace curtain panels and black tulle, I then attached sheer pink ribbons to the Tim Holtz Enameled Tags in the Embellishment Add On, and added some little embroidered flower pieces from my stash.

Here are some close ups os the banner work:


I just love how Shabby Chic and romantic this layout turned out!! One of my favorite looks~I do have a very romantic heart you know ;)

This next piece is an altered wooden box with a hidden drawer, and it shows the whimsical, sweet side to the kit. 


I did tons of layering here, there are distressed kit and add on paper layers, Doily layers that I masked with the stencil and misted with the mist in the Color Add On, fussy cut layers, as well of layers of flowers from the Flora & Fauna Add On , past kits, and hand stamped leaves.  There are layers of chipboard pieces from the Embellishment Add On, and stickers from the kit. The little yellow stripe dots, and twine were from the kit, and the Tiny Dancer Butterflies are from my Reneabouquets Etsy Shop.


Here you can see all the dimension that the layering created.

I covered the outside of the box drawer with some stash rose ribbon, then created a pull, by adhering a plastic bobbin, and topping it with a stash fabric button.


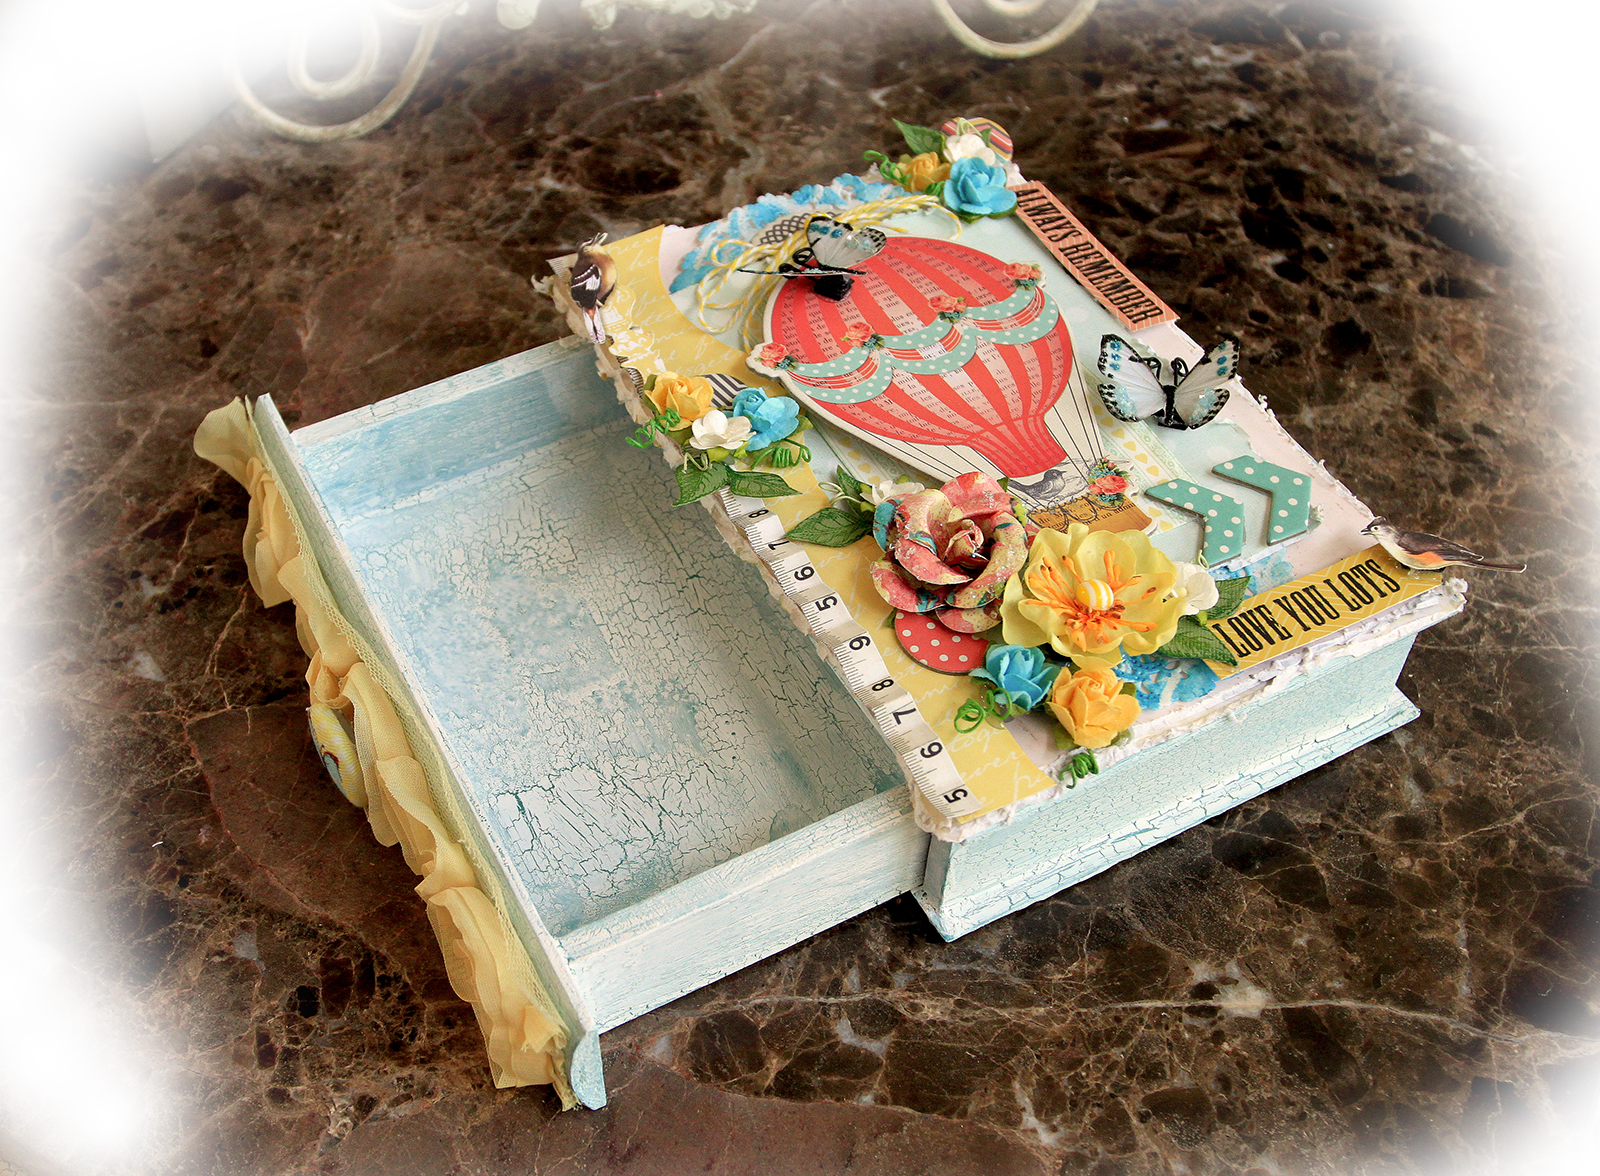
 Here you can see how the drawer pulls out for hidden treasures, and trinket keeping :)

 I treated the entire box to a layer of teal Jacquard paint then painted it with a crackle medium, and then painted it with a white coat of paint to reveal the yummy crackle texture, then inked with Tim Holtz Ink for color depth.

This box turned out so whimsically beautiful and is so perfect for storing memories and finds~a little hidden nook~so up my alley!! 

I hope you have enjoyed my reveal day projects, and I can not wait to get to work some more with this kit, and show off how versatile and wonderful it is!! Have a great weekend!! Hugs to you and your's ~ Renea


Thursday, May 30, 2013

Scraps Of Darkness May Kit-Destinations Design Team Reveal


Time for the Design Team to make their reveal with the May Kit-Destinations!!! I must admit I think my brain has been in the Art Deco/ Jazz Age  mode this past week. I have been reading the Great Gatsby, watched an Art Deco Architecture Documentary, and spent some down time gazing at Art Deco/ Jazz Age Ads, so when I got this kit all my brain could think about was that age and all the lines and shapes, so I think you will find it reflected in my work. I even chose Old Hollywood photos!! I just love the glamour of that era!!


This is the sketch that came with the kit this month. It was created by the lovely and oh so talented Suepup. I loved the sketch, and just gave it a 90 degree clock wise turn, and got to work. I loved the blues, blacks and greys in this kit, and the theme I had in my mind seemed to suit this old photo of Paul Newman so well that I just had to use it ;)


I used lots of layers of the kit papers, doing lots of fussy cutting, paper rolling, and layering.


I used some of the rub ons from the kit and applied them to some of the blue chevron pattern paper to add pops of blue to my mostly black, gray, and cream layout.


Here you can see were I took some of the map paper, misted it with the Lindys Mist from the color add on, then rolled it up and tied it with hemp rope and created a tag from the Tim Holtz metal tags in the Embellishment Add On. The tag with the star was an upcycle from a Converse shirt I bought at Target, and the little hot air balloon was another TH rubon done on the blue chevron paper. The gear is a piece of stash chipboard that I metal embossed, and the journaling "Not all who wander are lost" was another piece that I fussy cut out, then misted with the blue Lindy's Mist and then added some of the Tim Holtz star rub ons to.


I just love how the paper rolling looks layered dimensionally over the Chevron pattern that I fussy cut out of some of the kit paper. 

This next layout was so much fun! I just loved this photo when I saw it on Pinterest, and it just looked so perfect with the Art Deco look of the combined prints of the papers and super glamorous Luxe Circles from the Embellishment Add On.


I combined papers from the kit and paper add on in a framed look, and then cut the Luxe Circles down to size to fit behind my photo.


I fussy cut one of the Carta Bella Journal cards to create the top journaling, adding a little heart gem for some bling, and then added one of the Carta Bella Layered stickers from the kit below it. I just loved the polka dots on the sticker and decided to add in some sheer polka dot ribbon from my stash and some Polka Dots And Bling Butterflies from my Reneabouquets Etsy Shop. The flowers were from the Flora & Fauna Add on, and I added some of the Red ZVA bling from the kit to the circle background, and topped my layout with the gorgeous Craftysprinkles hand crafted pin.  


At the bottom corner I created an oversized flower arrangement by taking one of the patterned flowers and topping it with a past kit piece, and then arranging some of the flowers from the Flora & Fauna, banners from the kit, and some past kit flowers, stash tulle and ribbon into a multi patterned, multi color collage.


Here you can see the dimension of the layers on my layout.

Now, I would like to introduce you to a new segment that I will be doing over in the Scraps Of Darkness / Scraps Of Elegance Forums called "Make It In Minutes".

As a busy woman, who is constantly on the go, I can sympathize with those of you who say," I just don't have enough time to do all the things that I love! " But, I also know how important doing something creative and for yourself is to your overall mental health. It is so important that we take a few minutes here and there to do the things that we love. That is why I am going to try to do a segment with either the Scraps Of Darkness or the Scraps Of Elegance (both if time permits) to show you how you can "Make It In Minutes." It will show a project that can be put together in about 15 to 20 minutes, using the kit and one other add on, so that it is also budget conscience. 

For the first segment, I will be showing you how to make the following, glamour look card that is perfect for giving by itself or with any present, and for any occasion to one of those "Glamorous" women in your life. 


I hope you will join me!! 

Thank you for stopping by for my reveal, and I hope you find the time this weekend to create something beautiful for yourself!! Hugs, ~Renea

Monday, May 27, 2013

Scrapmatts Australian Chipboard May Reveal

It is time for my monthly reveal over at Scrapmatts Australian Chipboard. I just love working with all the wonderful chipboard pieces. They are so perfect for doing some of the "off the page" work that I love to do, and this month one of the Design Team Challenges was to take it  off the page, so I decided to do one of those altered printer trays that I love so much, because they involve tucking in lots of treasures, and little collections.  I also used my Scraps Of Elegance May Kit-Yesterdays to create this tray. This kit was so gorgeous, and sooooo very perfect for pulling off the romantic, shabby chic look I was looking for.


I started with a printer tray that I painted, sanded in places, and then script stamped.
I then got to work layering in lots of Scrapmatts Chippies, and items that reminded of things a lady would colllect, and treasure. 
The following is a list of the Scrapmatts Chipboard that I used:


The flowers on the top flourishes and dress form are Vintage Rose Quartz Texture Roses from my Reneabouquets Etsy Shop, and the Altered Postal Tea Time Tea Bag, and Fairy Butterflies are also from my shop.


I did so many techniques on this piece, like the script stamping you see here on the backside that also covers the sides and front  of the piece. Other techniques included: painting, seed beads, hand dyed seam binding, layering, distressing, paper rolling, decoupaging, and embossing.
I just love how this piece turned out~ so soft and feminine.

This next project is an Altered Memory Box. One of the other DT challenges was to scrap in the color choices given, and one of them was monochrome. I chose to scrap in champagne colors, and chose a Vintage sewing theme. I used my Scraps Of Elegance May Kit-Yesterdays, along with some of the pieces from the  Scrapmatts  CB1194 Sewing 02   set, and some stash Vintage lace panels, and trims.


The monochrome, champagne colors  worked really well with the Vintage theme, and gave a beautiful, tea stained look to the project.


Here you can see were I threaded the chipboard safety pin into some lace to add an accent at the top of the box.


I loved this little Vintage sewing machine and had to bring it to the forefront  by adding it to a Prima resist canvas piece. I tucked the little chipboard needles into some more trim and topped them with one of the little thread spools from the set. 


The Champagne Dreams Butterflies are from my Reneabouquets Etsy Shop.


I left the outside of the box the wonderful kraft color of the paper mache, then distress inked it heavily and distress stamped an Ephemera pattern onto all 4 sides.
I added some wonderful crochet lace trim from one of my Fav Etsy Shops Catherine Cole Studios, to the lip of the box.


I then created a faux drawer look, using a Vintage Metal Trinket with a Tim Holtz button layered on top.

I hope you have enjoyed my Scrapmatts Chipboard projects! I am hosting an ATC swap over in the Scrapmatts forums starting June 1st, so I hope you will join me!! Until next time, Big Hugs, ~Renea

Tuesday, May 21, 2013

Little Fairy Tea Cup

Today, I would like to share a little off the page project that I created using my Scraps Of Elegance May Kit-Yesterdays. I love anything tea, and throw in a fairy, cherub or winged creature, and I am doubly delighted!! I have seen renditions of paper tea cups, and wanted to create one all my own. I found a tea cup template at layersofcolor.com that I really liked,because it was fairly easy to assemble. I actually printed the template out onto the backside of my paper, and worked with it from there.


 I assembled the cup and saucer, then fussy cut out some of the roses from the kit paper and modge podged it onto the front of the cup. I then took some stash tea stained ribbon and went around the top of the cup.


I then took a little birds nest that I had collected last Winter, sealed and dried, and glued it to sit inside the cup. I then started filling the nest with goodies. I popped in some feathers, then took a little Vintage image that I had colorized and altered and glitter painted her wings up and added some bling, and then popped her into the nest. The big pink gem is a Petaloo piece from this month's add on, the little tea pot is one of the Prima resist canvas pieces from the kit, and the little eggs were handcrafted, from clay then painted by me. I then added some stash roses, pearl string pieces and a Pink Lemonade Crush Butterfly from my Etsy Shop.


I created a sweet little tea bag, using an empty tea stained, tea bag, some lace, pearls and a tiny rose. The rub on was from a past SOE kit and the little charm was from this month's Embellishment Add On.

This piece turned out so sweet and soooo Fairylicious!! I hope you have enjoyed your visit, and that you have a great week! Hugs, ~Renea

Thursday, May 16, 2013

Fly Shabby Chic Tag


So, I am beginning to think that May is the busiest month of the year for me, besides December!! I feel like half the month is gone and I don't know where it went to!! How many of you moms and wives are saying, "Oh girl, I hear you!" 
I have been to so many school awards programs, events, and social events, that I could be at home, alone for about a week and be quite happy :) Not only that, but I cater this big event at my son, Draven's school every December and May, and it just really takes up every spare second of  my time. So, I seem to be last minuting everything in my life right now, and one of those is the tag swap that we are doing over in the Scraps Of Darkness/Scraps Of Elegance Forums. I finally managed to pull it off, and created a Shabby Chic, Fairy themed tag using this month's Scraps Of Elegance Kit-Yesterdays. Thank goodness, Mel gives us such gorgeous kits to work with, because this busy mom had only about 30 minutes to pull this one off!! The tag is for my swap sister Helena (Willea). Thank you Helena for your patience, and I hope it was worth the wait!


I used some of the, oh so yummy Prima Fairy Rhymes paper from this month's paper add on for the front and back of the tag which is a Scrapmatts Chipboard Tag from my DT stash with them. I then layered on one of those delicious Gina's Design Doilies, a punched layer of kit paper, then painted a small piece of the corrugated board from the kit, then set some eyelets in it, and attached a little "find" piece from my stash. The little Prima Fairy chipboard image was from a past kit, and I misted some of the sweet little Prima Resist Canvas Butterflies from the kit and added them to the image. I added some stash trims to the bottom and the center flower is from this month's Floral Add On. At the top I made a bow from some crochet lace and hand dyed seam binding, then took another piece of the Prima Resist Canvas, misted it and glittered the letters. 

I had so much fun making this tag and I hope Helena loves it!! Thank you for taking the time out of your busy lives to drop by and check it out! I know I am behind on lovies right now, but I promise that as soon as I get this event under my belt, I will catch up :) Hugs, ~Renea

Wednesday, May 8, 2013

She Loved To Collect Trinkets And Treasures

Today, I would like to share an 8 x 10 canvas that I created with the Scraps Of Elegance May Kit-Yesterdays. I just love all the She Art pieces that I have seen others do, and have wanted to try my hand at them, but wanted mine to reflect me and my own style. I kept trying to wrap my head around how I would want mine to look and then I was reading through my "Sew Somerset" magazine and there was an article by Carrie Payne. Carrie is an artist who loves to sew her She Art pieces into quilts, and she confesses that she is a "Magpie" which is a person who collects things, especially things of little use or value, and  to which I can so relate. I am definitely a Magpie!!  She creates her quilt "She"  and gives them dresses with little treasures tucked into them. I wanted to give my "She" a similiar look, but decided on layers of pink and white, glitter tulle to get a more airy look and feel.

 I did tons of medium layering to get the background. I painted the first 2 layers with  white acrylic paint, then used a stencil and Jaquard paint to create the background pattern. I then misted, using the mist in this month's color add on, and sponge painted some pinks and golds in. I did another stencil layer using the Shimmerz Texture Pantina in this month's C.A.O. , and  stamped with a crackle stamp, added seed beads, and used some of the rub ons from this month's embellishment add on, and layered in some of the Gina's Design Doilies. 


The face and arms were created from some of the kit Prima Fairy Rhymes paper, and then I added card stock hair that I used some more rub ons to add pattern and then accented with a small rose. The "body" is one of the Prima Resist Canvas pieces from the Embellishment Add On.


I created the "dress" by taking layers of white and pink tulle that I gathered with my sewing machine, and then added in lots of trinkets. The flower at her waste was created with a Petaloo trinket from the E.A.O. that I added gems to, and the bottom metal piece was from that same Petaloo pack, and I just inked it and added a pearl center. All the little canvas pieces and banners were the Prima resist canvas, and the button was from the E.A.O. The trim was from the kit and then I added in a few stashed treasures as well.


My journaling appropriately reads "She Loved To Collect Trinkets And Treasures". All the butterflies are Prima Resist Canvas that I added seed beads and wire antennas to.

I really love how this turned out!! It really reflects my love for collecting things and I enjoyed getting to try something new. I don't think it is something I would like to do often, but it is always fun to push yourself out of your element and to try something challenging. I hope you find the time to try something new, and to express yourself through art. It really is freeing.  Hugs, ~Renea

Sunday, May 5, 2013

Scraps Of Elegance May Reveal With The Yesterdays Kit


Scraps Of Elegance has unveiled it's, so very gorgeous, May Kit-Yesterdays!


 This kit is loaded with so many stunning and feminine items that include Prima Fairy Rhymes and Pink Paislee Hope Chest Papers, intricate Cardstock Doilies and chipboard bird cages from Gina's Design, and made just for this kit Fairy Butterflies by Reneabouquets Etsy Shop. 


Here is this month's inspirational sketch created just for the Yesterdays Kit by Suepup
And below is my take on the sketch, titled Shadow & Light:


I love the art of dance and when I saw this photo on Pinterest, I just knew I had to use it. I love the play of light, the shabbiness of the worn wall, and the beauty and line of the dancer depicted. I did lots of punching and the Doilies in the kit made a wonderful, delicate backdrop for the photo. 


Here you can see where I did lacing with hand dyed seam binding, and then created a lush floral arrangement using lots of flowers from the kit and Flora & Fauna Add Ons. The large script flower is one that I created out of tea stained tea bags. I will have a tutorial for that in the next week or so, showing how I created that layerlicious flower.

Here I used the wonderful chipboard birdcage from the kit. I painted it then decorated it with seed beads and flowers, as well as one of the Fairy Butterflies that you can find in my Reneabouquets Etsy Shop.


That sweet little charm was in this month's Embellishment Add On.


Close up of those amazing flowers~really love the shabbiness of them!!


I always like to do a shot that shows off the dimension that you can achieve with layering.


In the Scraps Of Darkness/ Scraps Of Elegance forums, I host an ATC swap, and this is one that I created to swap with my scrappy sister Kathy Mosher (KathyInAlaska). Kathy had created me a magical fairy tag, and when I got this kit, I just knew I had to create her one as well. Kathy is just the sweetest Mama Bear, and I just love her maternal personality. She has that special way of making you feel loved, even though you have never met her~she is magical!! 

Thank you for taking the time to drop by and to visit me!! I can't wait to get to create some more with this amazing kit. Why does life have to be so busy??!!  Hugs ~ Renea